
Working with wordprocessed documents is something that almost every student will need to know how to do at some point. These are required for coursework for both iMedia and A Level Computer Science, and used in assignments to show our work.
In the following tutorial, I have shown the process of creating an assignment containing elements of a long document, images, and exporting to a PDF.
- Creating A Document With Headings
- Adding Images
- Downloading Images from Canva
- Adding a Contents Page
- Compressing Your Document (reducing file size)
- Saving to PDF
Creating A Word Document With Headings
Start by opening a new document in Word. Make sure that the assignment title is at the top with your name. Start by adding in your titles like the image shown below:
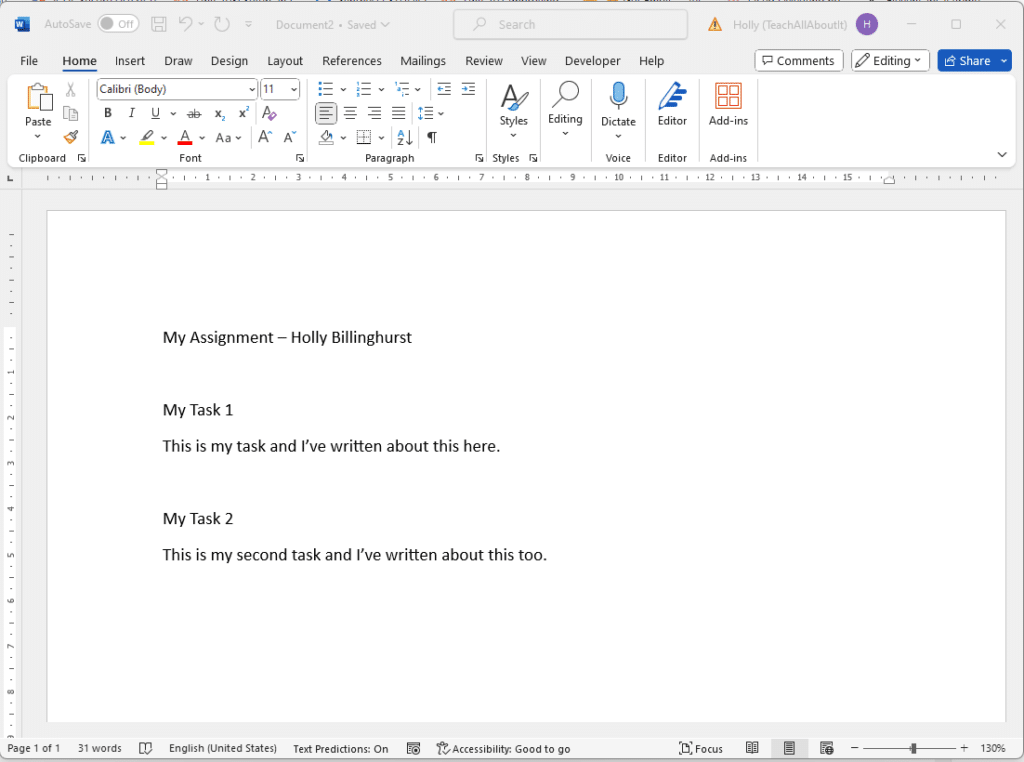
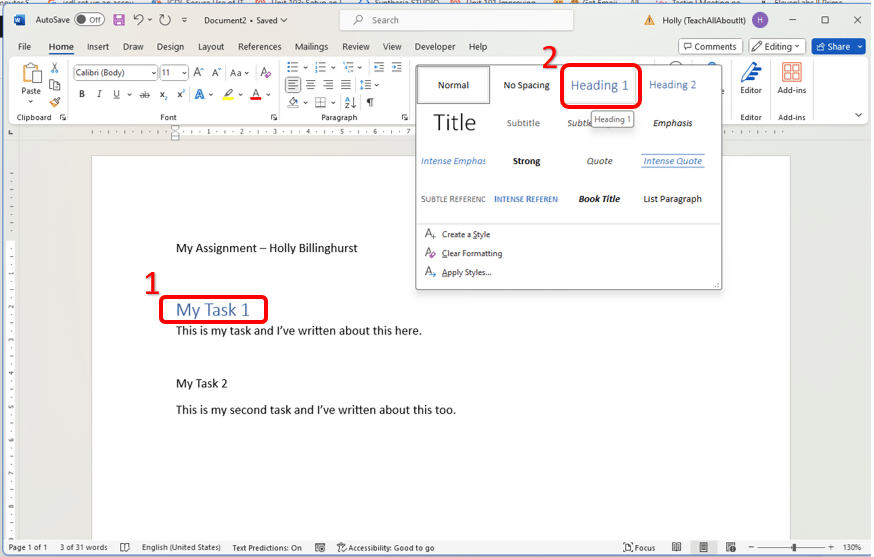
Select the text that you want to turn into a heading, then select the type of heading you want from the style menu.
Adding Images From Your Computer
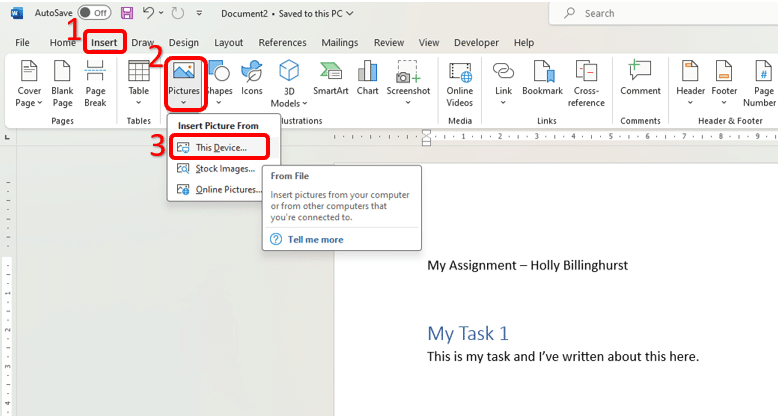
If you have taken a screen capture from your computer, you can paste this straight into your document using Ctrl + V (or Cmd + V on Mac), but if you have a picture saved on your computer, go to Insert –> Pictures –> This Device then select a picture from your folders.
Adding Images From Canva
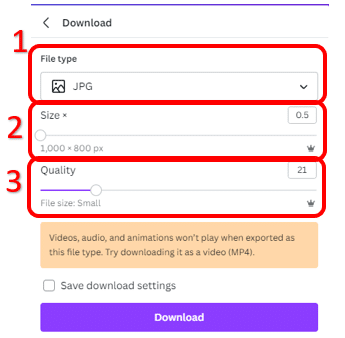
To add an image from your Canva account, you will need to download a copy to add to your document. To download an image, click Share –> Download.
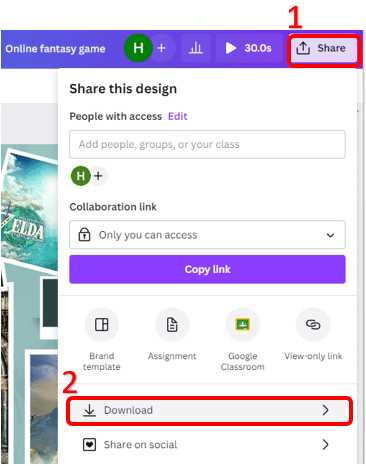
In the download menu, select .jpg as your download (unless you need transparent areas, in which case use .png). Bring the size down to between 500 – 1000px and set the quality to “small”.
Click on download, then add the image from your Downloads folder using the instructions above for adding a file from your Device.
Adding A Contents Page (for long coursework documents)
These are only needed if you are writing a long piece of coursework or assignment of 10 pages of more – these aren’t needed for weekly assignments!
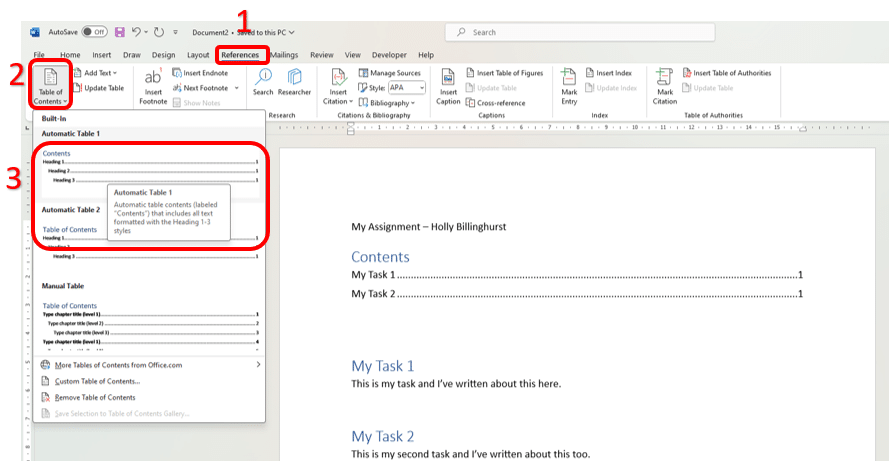
As you have already followed the instructions above for setting up your headings, your document will be ready to add an automatic table of contents. Click on References –> Table of Contents –> Select your preferred style.
Compressing Your Document
Sometimes you’ll find that your document is too large to upload. Word includes an image compression tool to help make your document smaller.
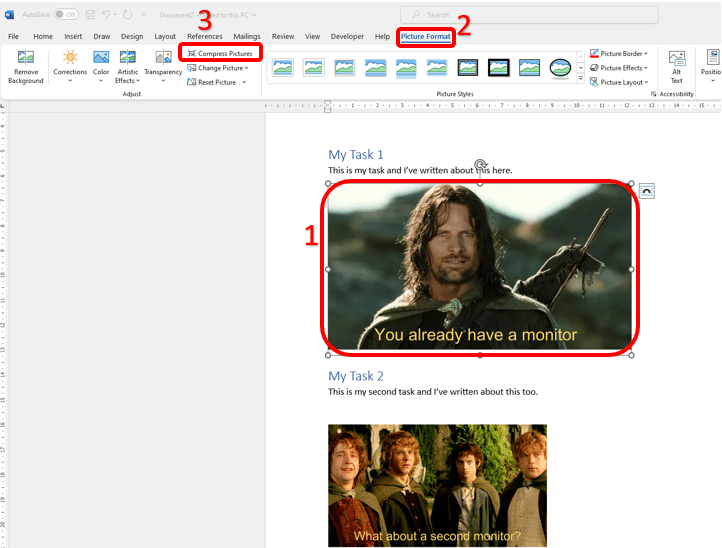
Once you have added an image to your document, click on the image, then select the blue “Picture Format” menu –> Compress Pictures.
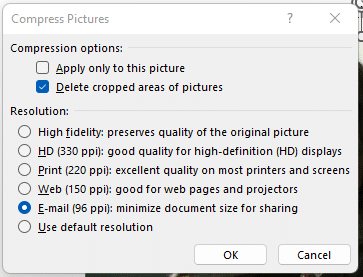
In the pop up menu that appears, uncheck the “Apply only to this picture” so all images are compressed, but leave “delete cropped areas” checked. Select the smallest resolution of Email (96dpi) –> click OK.
Don’t forget to save after compressing!
Exporting Your Document to a PDF
To save your document as a PDF, click File –> Export –> Create PDF. Choose where to save your PDF version to & your document is ready to upload!

- Creating A Document With Headings
- Adding Images
- Downloading Images from Canva
- Adding a Contents Page
- Compressing Your Document (reducing file size)
- Saving to PDF
Creating A Google Doc With Headings
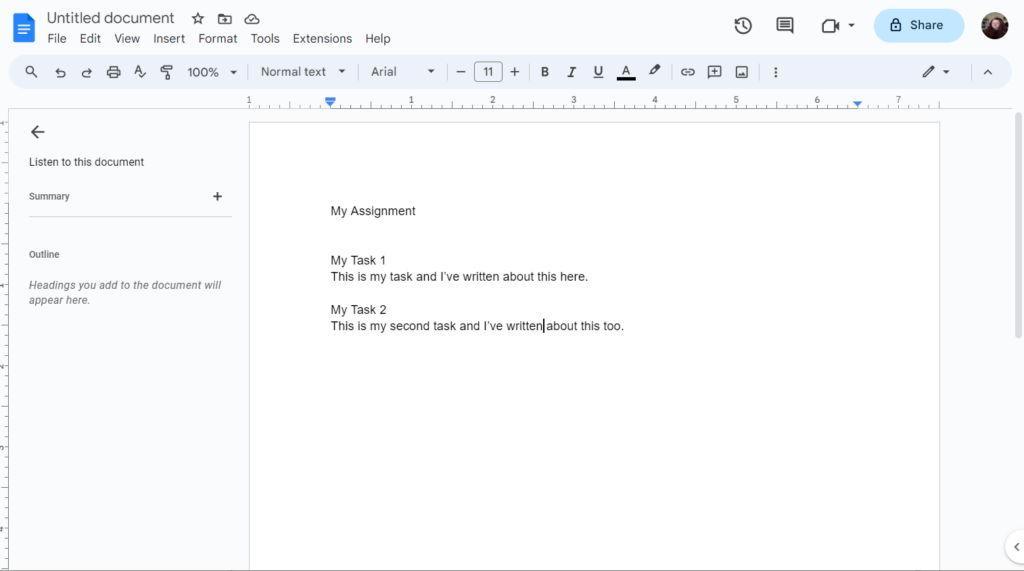
Start by opening a blank document in Google Docs. Make sure that the assignment title is at the top with your name. Start by adding in your titles like the image shown below:
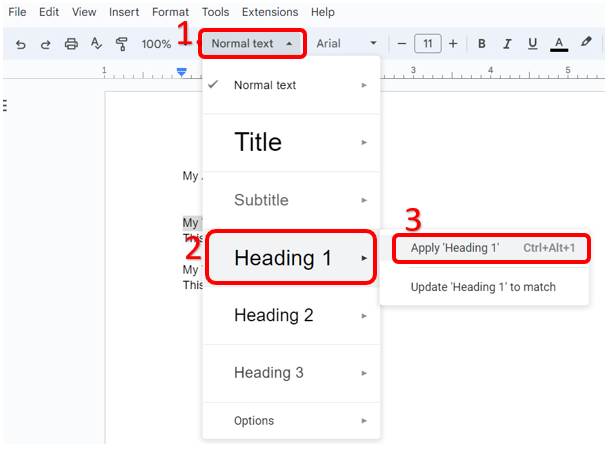
Select the text that you want to turn into a heading, then select the type of heading you want from the style menu.
Adding Images From Your Computer
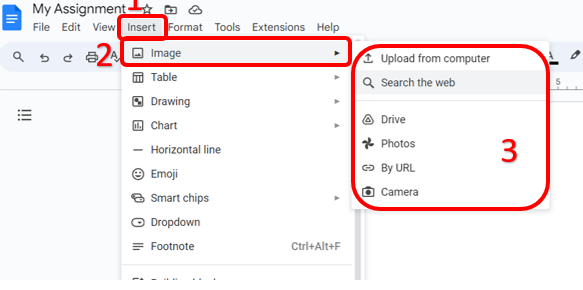
If you have taken a screen capture from your computer, you can paste this straight into your document using Ctrl + V (or Cmd + V on Mac), but if you have a picture saved on your computer, go to Insert –> Image –> Upload from computer then select a picture from your folders.
If you’re using a tablet or mobile device, Google Docs also allows you to add pictures using your device camera. This is particularly useful for adding hand drawn diagrams or sketches.
Adding Images From Canva
To add an image from your Canva account, you will need to download a copy to add to your document. To download an image, click Share –> Download.
In the download menu, select .jpg as your download (unless you need transparent areas, in which case use .png). Bring the size down to between 500 – 1000px and set the quality to “small”.
Click on download, then add the image from your Downloads folder using the instructions above for adding a file from your Device.
Adding A Contents Page (for long coursework documents)
These are only needed if you are writing a long piece of coursework or assignment of 10 pages of more – these aren’t needed for weekly assignments!
As you have already followed the instructions above for setting up your headings, your document will be ready to add an automatic table of contents. Google Docs will already have a navigation panel to the left, so this is more useful for printed or exported documents.
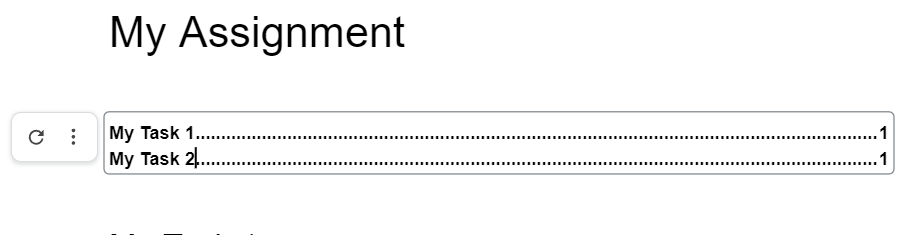
Click on Insert –> Table of Contents (at the bottom of the menu) –> Select your preferred style.

As you write your document, you can update your contents page by clicking on the table of contents & clicking the refresh icon that appears to the left.
Compressing Your Document
Google Docs automatically compresses any image that you upload to your document, so you’ll have the most optimised version already.
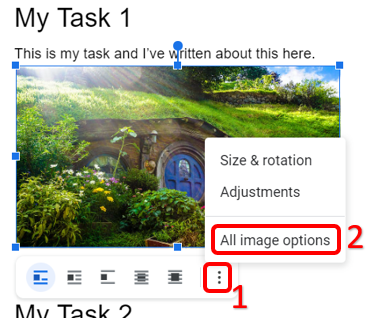
If you want to make any adjustments to your images once you have added an image to your document, click on the image, then select the three dots on the right of the format bar, next select All image options.
Exporting Your Document to a PDF
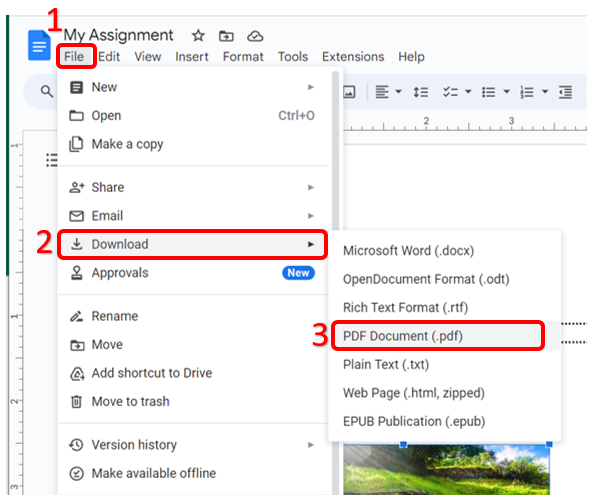
To save your document as a PDF, click File –> Download –> PDF Document. Your document will be saved in your Downloads folder – don’t forget to move this into a folder on your device. Once downloaded, your assignment document is ready to upload!
Although my courses are run on the understanding that all instructions are provided for Windows & Office, I do understand that not all learners will have access to this.
For ICDL courses, Windows is a prerequisite and other operating systems cannot be used.
For iMedia courses, I strongly recommend that students are using Windows and a Graphics Tablet as this is the standard for all tutorials.
I have included a detailed help video below that covers the same topics as I have written about in the previous tutorials – I’d recommend using the bookmark links on the video as it’s quite long!